I am I must confess obsessed with birthday cakes. Duncan will tell you that I hate missing out on a piece of cake and when asked if there's anything I needed picked up from the shops on his way home from work my answer to his question is almost always 'cake'. Growing up, every birthday before the age of 12 was marked with a big birthday party and the centrepiece of that happy occasion was always the birthday cake. Leading up to the big day my sister and I would pour through my Mum's cake decorating books to select 'the one'. Whether it be Garfield, a doll/princess or Strawberry shortcake shaped cake, the event of celebrating a birthday began with the selection of the cake in the weeks leading up. Celebrating Matthew's birthdays so far has been no different and happily for me it brings back memories of my childhood. Not knowing Matthew's likes and dislikes, the decision for Matthew's 1st birthday cake was solely ours. This year however with Matthew's continued obsession with Buzz Lightyear it was an easy choice to settle on a Toy Story themed party and hence an equally themed birthday cake. For Matthew's 2nd birthday, I'm attempted to make a Buzz Lightyear rocket cake.
My criteria for any birthday cake is simple, it must look good AND taste good. The basis of a good cake is a yummy cake recipe and nothing is better than a chocolate mud cake, though Duncan would argue it's my vanilla cake recipe. There was a heated debate in the car on the way to school last week as to which type of cake and ganache to use. In the end, the chocolate mud won... as it always will ;)
Some weeks before Matthew's birthday...
I started off the process by scouring the internet for a picture of the Buzz Lightyear rocket. This was the closest picture I could find.
 |
| Buzz Lightyear Rocket Inspiration |
From that I created a template for the shape of the cake (using much creative license here I might add) keeping within the limits of a 16 inch round cake board. You have to use your imagination to picture it as a 3D cake.
From there I had to figure out how much cake I needed to form the cake based on the size of the template I'd drawn up and then from there you have a rough estimate.
 |
| Cake template |
Day 1
The mud cake recipe that I chose is the one from the
'Planet Cake' book by Paris Cutler. I knew it would be good as it's the one used for Matthew's 1st birthday cake. If you want a copy of the recipe please PM me. This particular cake if you follow the recipe exactly is super rich, for the purposes of a Matthew's party, I omitted the coffee granules. It's not for the feint hearted either, it's got so much choc and sugar in it, it'll send most kids and adults hyper! But boy does it taste good. For Matthew rocket cake, I used a 30 x 30 cm square tin AND a 20 x 15 cm tin and basically made 2.5 times the quantity asked of the ingredients in the recipe book spread over both cake tins. Before working on the cake it's essential to let the cake cool completely, so leave it to rest for 24 hours.
 |
| Crust of please! |
 |
| 30 x 30 cake |
 |
| 20 x 15 cake halved. |
Day 2
Ganache is essentially cream and choc, in our case semi sweet dark choc and cream. I mixed 1.2 kg of dark choc with 600ml of pure cream ... I warned you, this cake is not for the feint hearted! (Did I mention somewhere that I'm at risk of gestational diabetes?!?!).


Using the layers of cake and ganache I formed the basic shape of the cake. Oh, by the way, you need to cut off the top crusty layer of the cake, so that the texture of the cake remains consistent throughout. It's also a good idea to use syrup (eg. apricot conserve diluted with Grand Marnier) and brush all the cake surfaces to seal in the moisture. Once you have the basic shape sculpted, finish with the ganache. Take your time with this part, as this is the most crucial part of decorating using fondant, the smoother the finish you have on the ganache, the smoother your layer of fondant will be. A ganaching tool is your best friend here, I picked mine up from Planet Cake during my cake decorating class last year, but you can pick one up from a good cake supply shop. A good one will be metal with a nice clean edge on one side and a curved edge on the other. You want a metal one because it helps to dip it in hot water to heat it so your can run the edge over cooled ganache to get that perfectly smooth edge.


As we now live in a country which averages 32 degrees all year round with high humidity, I wasn't sure how the fondant and ganache was going to cope, so in between working on the ganache and fondant I rested the cake in the fridge. It's generally not the best idea to place a fondant covered cake in the fridge as it can dry out and crack but it was the lesser of two evils.
Day 3
Now the fun bit, decorating with fondant. I didnt want to risk making my own fondant as handling it in humid hot weather can be tricky. So last weekend I bought a 2.5 kg tub of white vanilla '
Satin Ice'. The lady at the cake supply shop assured me that it tasted good and that it handled well in the Singapore weather. While the little Birthday Boy to be was asleep I started rolling out my monster piece of white fondant to cover the entire cake. Once again be patient. Using the correct cake making tools helps, like an acrylic rolling pin and fondant smoother. Looks pretty good I think. The rest is pretty straight forward and fun. I coloured the fondant and cut and attached the individual pieces free hand, like I said, you need to exercise a lot of creative license.
Voila!
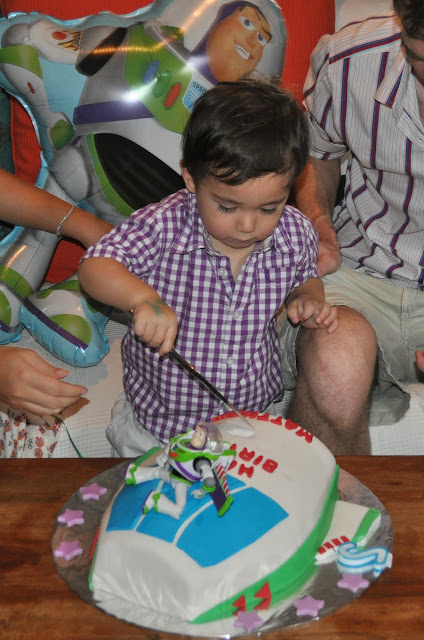
The end result is a monster of a cake, to be finished at the party venue tomorrow complete with Buzz Lightyear figurine and '2' candle in the centre. Pictures of the birthday boy with his cake to be posted in the next update! I hope he likes it ...
Picture added 28th May :)